

 - By Dmitry_CAD
About us
The Lucky Needle is an online resource for the upholstery community. Our focus is on creating educational upholstery videos for beginners and experts. Read more...
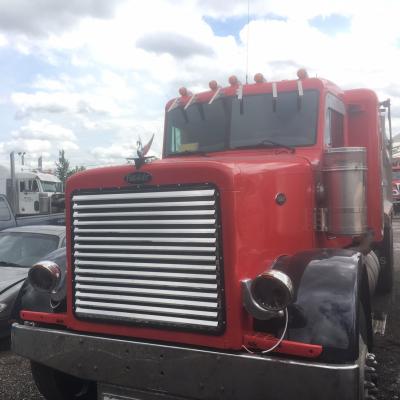
Bondo497 wrote: ↑Sat May 05, 2018 10:33 pm @SmokinSCustoms@Bondo497 On the smaller pieces I've been using water resistant panel board like the factory did. On the larger pieces, like the back of the sleeper in this 362 cabover I'm using 1/4 birch plywood. I've never used this thin plywood before so we'll see how it goes. The fun thing about using the panel board is if you want a neat edge on your finished door panel you can stitch through the panel board. That's how I ended up doing these Kenworth door panels.
What type board are you using for your panels?
John wrote: ↑Sun May 06, 2018 12:12 am Steam would also help get those wrinkles out.@John I've never tried steaming. Are you talking about just using a standard clothes iron? I noticed just a bit ago someone earlier in the thread talking about the backing being different. Sure enough it is and this vinyl likes to stretch more one way than the other. Other vinyl's I've used in the past didn't really have a backing and this wasn't an issue. The problem with this is that I can only orientate this vinyl one direction in order to cover my larger pieces. Any thoughts on that?
Looks great once its installed. Nice work @SmokinSCustoms !
Bondo497 wrote: ↑Sun May 06, 2018 12:10 pm @SmokinSCustoms@Bondo497
I never even thought about sewing strait through the board. I planned on glueing onto the aluminum pegboard the 352 has in it and screws and buttons on the headliner. Have you sewn any scrolls yet? That's what I've really been trying to hone my skill at since this truck has lots and lots of scroll work!
John wrote: ↑Sun May 06, 2018 6:08 pm Hahaha Yeah I was blown away the first time I saw someone sew through panel board. But it does works. Goes to show you how strong those machines are!@John No problem, I've ate, drank, and slept trucks since I was a kid. Started out turnin' a wrench on them, then paint and body, now interior. People gripe about how much it cost to restore a car........they should see the cost of some of our parts. Guys easily drop $40-50K to restore one to a decent condition. As far as "show trucks" go the sky's the limit on $ spent on them.
@SmokinSCustoms great advice! I have not worked on many big rig interiors. Thanks for sharing your experience.
Bondo497 wrote: ↑Sun May 06, 2018 11:24 pm @SmokinSCustoms@Bondo497 That's pretty much my same setup 10" throat and servo motor. My problem with my machine is its really hard starting. I dunno if its just not broke in yet or what, but its really tight when my needle is all the way up. I wish I knew more about the machines and how to "tune them up" a bit for easier starts.
Hey thanks for the heads up on glueing to the aluminum, I see your point. I will use them for patterns like you suggested. The throat on my machine is only 10" but it has a servo motor so I'm able to crawl through the scroll pattern while folding up the excess to clear the space of the throat otherwise I couldn't keep up with the stitches.
SmokinSCustoms wrote: ↑Mon May 07, 2018 12:09 am @Bondo497 That's pretty much my same setup 10" throat and servo motor. My problem with my machine is its really hard starting. I dunno if its just not broke in yet or what, but its really tight when my needle is all the way up. I wish I knew more about the machines and how to "tune them up" a bit for easier starts.Hey @SmokinSCustoms Ive never used your model machine before, but that's tightness is probably not normal. Sewing machines don't have break in periods like that. After looking at the pictures again of your recent panels. My gut still says you have a thread tension problem, like something is threaded improperly. Its really hard to tell with out being able to put my hands on the machine. Make %100 percent sure the bobbin is installed so that its spinning the right direction.
John wrote: ↑Mon May 07, 2018 5:40 am@John With the motor off the belt the machine seems to run though pretty smooth by hand, just a hair bit tighter when its completely topped out. However, once the motor is on the belt it tightens up quite a bit. Brand new motor, I wouldn't have thought there would be an issue with it but I have seen stranger things. What's the best way to look into motor issues you think? I've got an electric motor shop not too far from me, but they mostly deal in oilfield motors.SmokinSCustoms wrote: ↑Mon May 07, 2018 12:09 am @Bondo497 That's pretty much my same setup 10" throat and servo motor. My problem with my machine is its really hard starting. I dunno if its just not broke in yet or what, but its really tight when my needle is all the way up. I wish I knew more about the machines and how to "tune them up" a bit for easier starts.Hey @SmokinSCustoms Ive never used your model machine before, but that's tightness is probably not normal. Sewing machines don't have break in periods like that. After looking at the pictures again of your recent panels. My gut still says you have a thread tension problem, like something is threaded improperly. Its really hard to tell with out being able to put my hands on the machine. Make %100 percent sure the bobbin is installed so that its spinning the right direction.
What I would do is completely unthread the machine. even remove the bobbin. Then turn the machine over my hand and see if the tightness is still there. If it turns smoothly you have something wrong with your thread
If its still tight after that disconnect the belt from the motor to machine. Spin by hand. If its smooth you have something up with your motor.
If its still tight you have something wrong with the machine. Then I would oil the heck out of it. Every moving part you can reach while rotating the hand wheel . Let it sit over night and check to see if its better. If not youll want to call the place you bought it from and ask why its so tight.
I really hope this helps.
https://i.imgur.com/mXJXjb0.jpeg
![]() How to Proper[…]
How to Proper[…]
Great first post! What I find especially interesti[…]
 - By Ron Henningsen
Nice looking web site that NoCoastUpholster has. G[…]